How to Create a Front-End Login Page in WordPress
This is not just great for existing members but may impact new visitors even more. New visitors will now see the login section, which should have a “Register Now” option, and will be more likely to sign up. Today, I will demonstrate how to create a front-end login page using the Theme My Login plugin.
Why Create a Front-End Login Page in WordPress
Like most subscriptions and memberships, it is quite difficult to get people to sign up for one. By creating a login area and page, visitors will see it more often. The more exposure you can give your subscription, the higher the chance that someone will actually subscribe or sign up for your website. By default, visitors will be brought away from their current page and brought to the WordPress admin area to sign up.Not only is this inconvenient to the visitor, it also looks terrible when compared to other websites that have taken the time to set up a front-end login page. If this is a paid membership, it is unacceptable to have visitors use the back-end to log in. This is not just a benefit for new user registration, but existing users will have a more pleasant experience logging in. This will keep visitors out of the admin area and keep them surfing your content.
How to Create a Front-End Login Page in WordPress
Today, I will demonstrate how to create a front-end login page using the Theme My Login plugin. It is a popular plugin with over 100,000 active installs and provides all of the tools we will need to make a great login area. Even if you are not going to customize them, it gives you a login, log out, register, and lost password template pages that are ready for use.Let’s start by going to the plugins area of WordPress and click on the “Add New” button.

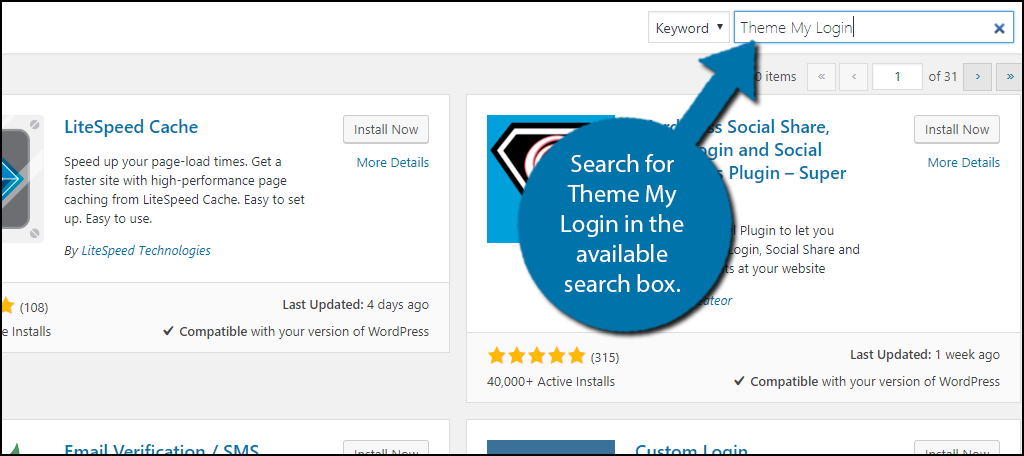
Search for Theme My Login in the available search box. This will pull up additional plugins that you may find helpful.
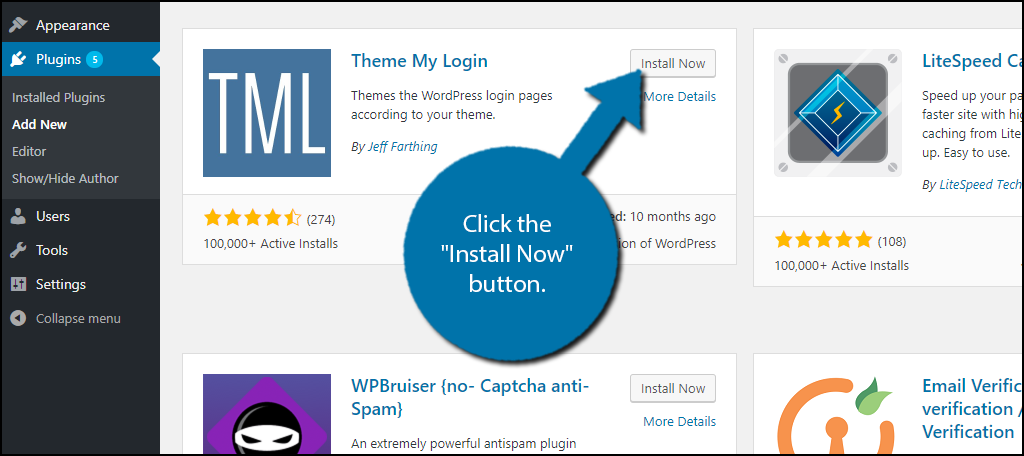
Scroll down until you find the Theme My Login plugin and click the “Install Now” button and activate the plugin for use.
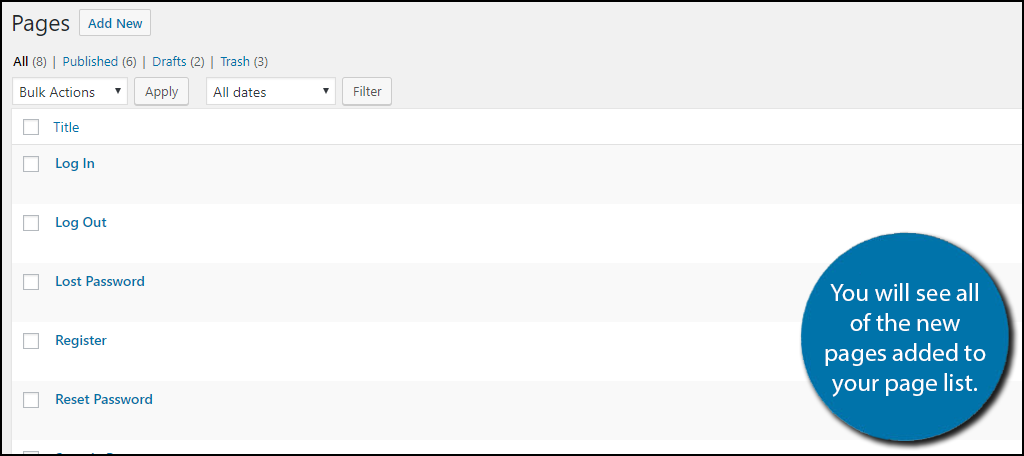
On the left-hand admin panel click on Pages and select the All Pages option. You will now see a Log In, Log Out, Lost Password, Register, and Reset Password page added to your page list.
Each one of these is ready to be used when activating the plugin. If your only goal was to get some simple login pages to use on the front-end of your website, then congratulations, you’re done, but you should spend some time customizing these and making them feel like your website’s login page instead of the plugin’s.
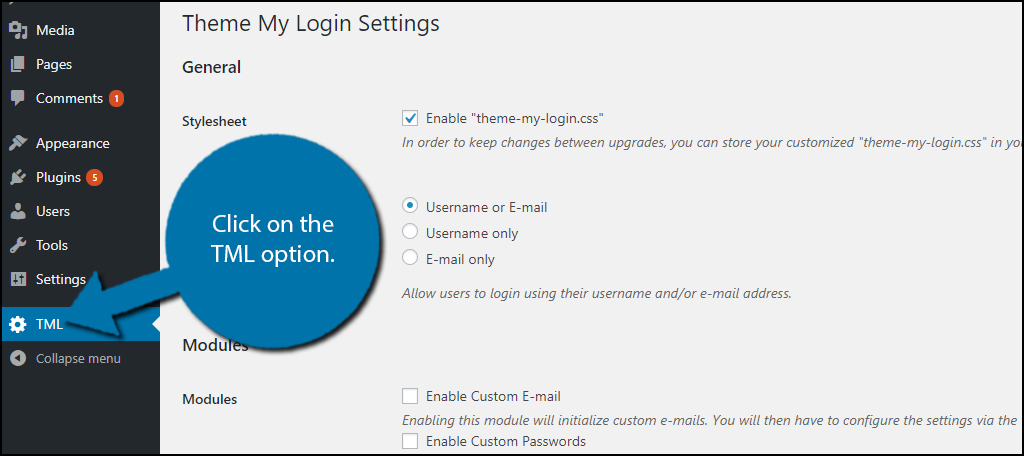
To change the Theme My Login settings, click on the TML option on the left-hand admin panel. This will open up the main settings to change what information is needed from visitors.
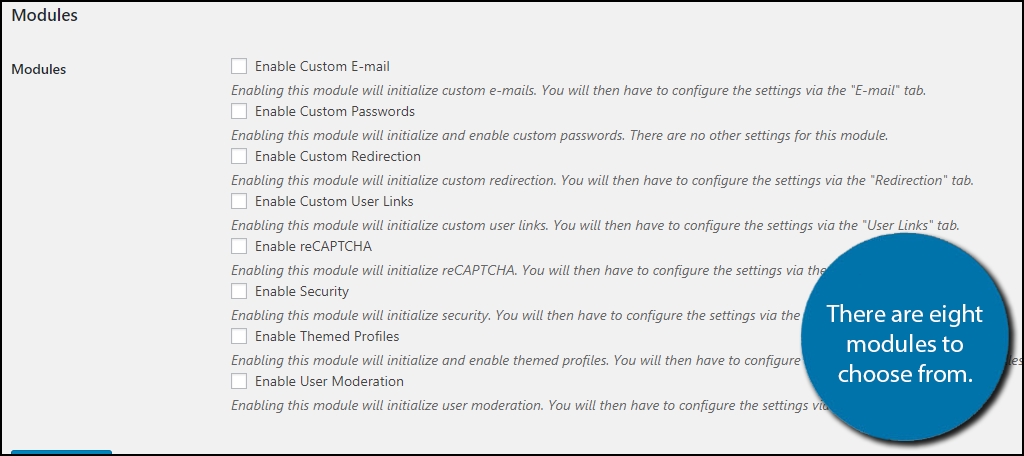
You will notice that the default plugin does not appear to have many settings, but that is just because they are not enabled. You can fully customize everything on this plugin! This is accomplished by enabling modules. There are eight modules that range from customizing emails to adding reCAPTCHA to your login area. To enable one simply check the appropriate box and remember to click on the “Save Changes” button.
Keep in mind that if you are using other plugins to accomplish what the module is trying to do, then it is better to leave the module disabled. This can cause compatibility issues and cause unexpected errors, which can be very frustrating to a visitor that already dislikes signing in.
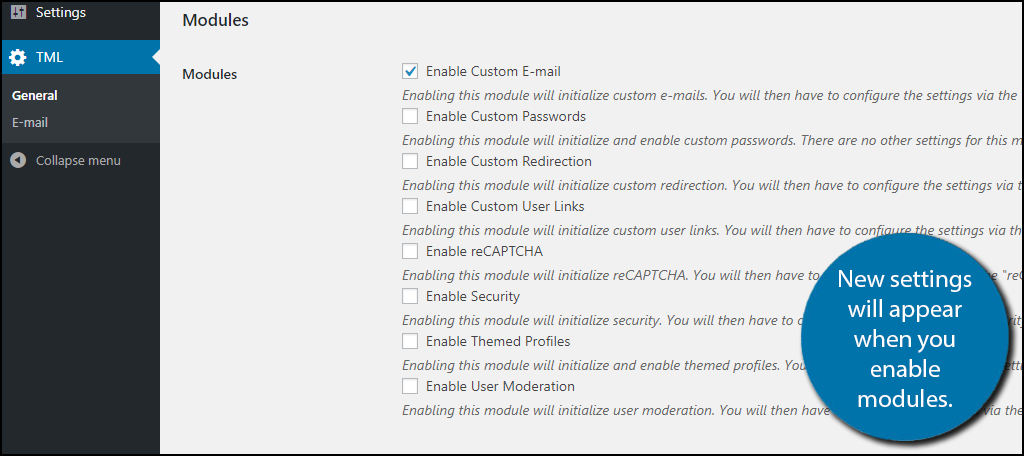
Once you have enable a module and have clicked on the “Save Changes” button, you will see a new section of the TML settings appear. Each section of the TML settings is named after the module that was enabled. In my case, I enabled the Custom E-mail and saw E-mail appear in the left-hand admin panel.
Each module will change your login pages and can be edited on their separate settings pages. Go through each of the modules if you want to add additional features to the pages. They are all extremely easy to use and can really help your visitors’ experience.
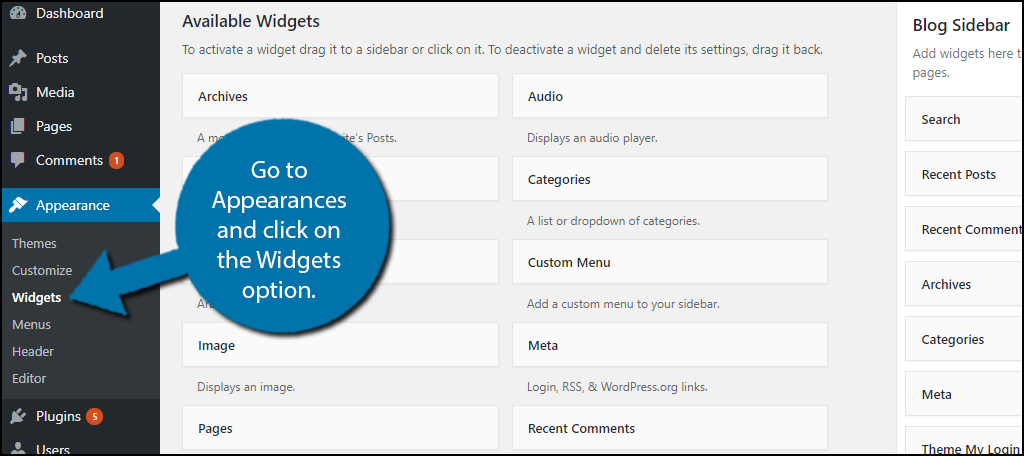
The plugin does not stop here, it comes built-in with a Theme My Login widget. This widget can be used to add a login area on the sidebar of any page! This is a great addition to any website. Go to Appearances and click on Widgets in the left-hand admin panel.
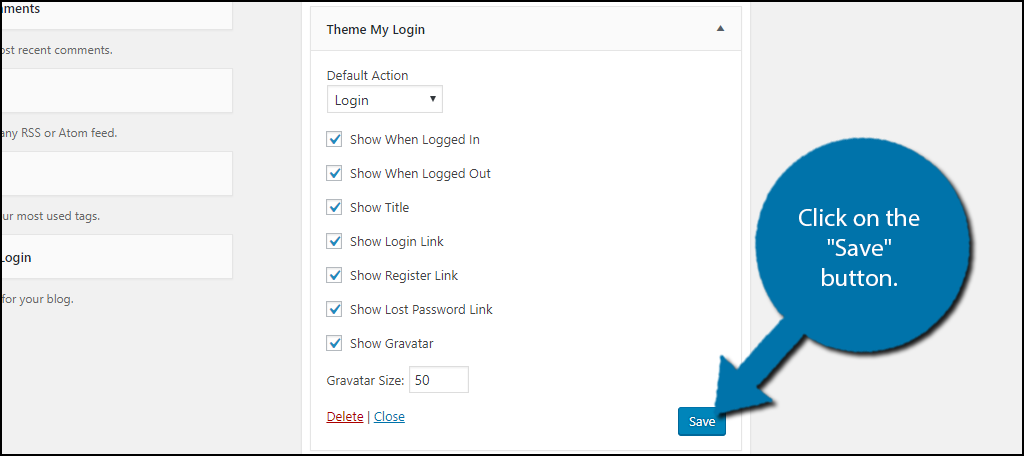
Find the Theme My Login widget and drag it into your Sidebar area. The widget allows you to choose what appears on the sidebar, so customize it to fit your website’s needs. Click on the “Save” button to add the widget to your website.
Congratulations, you have successfully set up a front-end login page and added a login area to your sidebar on any page of your choosing. This plugin is great and has a lot of useful tools to help your website out. Remember that if you are already using another plugin to do something that a module adds, you do not want to enable the module.
Make Logging in Easy
Logging in is not the highlight of anyone’s day, but it is sometimes necessary and making a dedicated login page can help make it easier. Adding a login area to your sidebar can make it even easier than a page. Always make the login process as swift as possible because the quicker people log in, the quicker they can enjoy your content.How easy did you think the Theme My Login plugin was to use? How many modules did you enable on your website?
Comments
Post a Comment